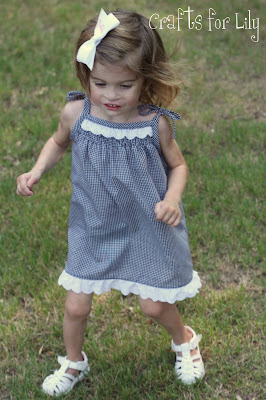
When I first began sewing, I relied completely on patterns. Now, I have discovered that drafting your own patterns can be quite easy and today, I am going to show you how to make this cute little dress and you DON'T need a pattern!
The dress was inspired by a First Impressions dress I saw at Macys.
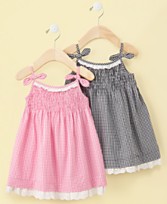
Cute dress--not a cute price (although it is on sale now)! I instantly knew it would be easy to make and to customize for a perfect fit! Now, I will go ahead and say this up front--this is the first and probably last sewing tutorial I have ever written (it is a lot more challenging than one would think! Not to mention, I kept forgetting to take pictures!)
Let's get started! You will need the following materials:
- Fabric (amount will depend on your child's size)
- Thread to coordinate with your fabric
- Elastic thread (found in the ELASTIC notions area of your local fabric store--not in the thread section)
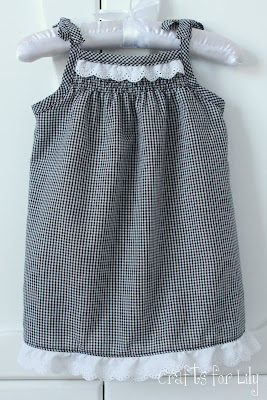
- Eyelet lace
- Optional: Store bought 1/4" double fold bias tape (I made my own)
The first thing we are going to do is to make a rectangle for the body of the dress. The easiest way to do this is to find a dress your child and measure it at the widest point (typically at the bottom hem). Write down this measurement and add in a seam allowance for BOTH side seams. Think ahead to how you want to finish your seams. If you are going to do a French Seam, then a 5/8" seam allowance is my preference. If you are going to use a serger, then a 1/4" seam allowance is what I tend to use. For this dress, I opted to use a serger, so my seam allowance throughout will be 1/4".
Next, if the dress you are using is the length you like, you can measure it from the chest to the bottom hem. If it is not, then measure your child from her chest to where you would like the dress to land. Now, if you are working with a toddler, it is MUCH easier to use a dress (my model doesn't do "still" very well!) For an 18 month size, my rectangle is 15 " long x 15" wide (but my daughter is a skinny minnie, so you might want to add a couple of inches to the width).
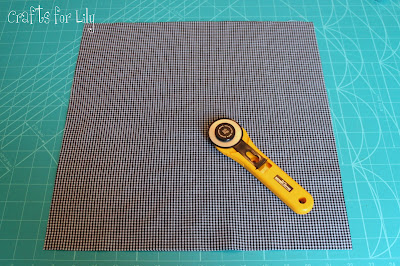
Cut two rectangles (one for the front and one for the back). If you have a plaid or horizontal stripe, make sure you line up the design for a more professional look.
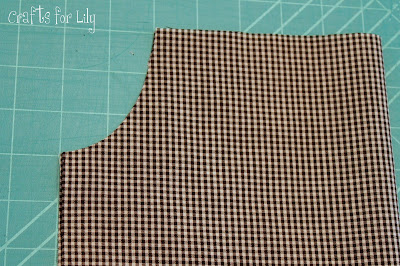
Now we will cut out the armscye (armholes). These will look like little "J"s on each side. If you have ever made a pillowcase dress before, then you are familiar with this step! My armscyes are 3" long x 2" wide.
Ok, let's begin our dress construction!
On one piece, fold over the top edge 1/8" and press. Repeat and topstitch across to create a finished edge. This will become the back of the dress.
It's time to shirr the top of the front and back of the dress. This is one step in which is dependent on your machine. If you have never shirred before, you'll want to do a quick internet search to find out how your bobbin should be loaded with elastic thread. Some machines require a hand wound bobbin. Others, like mine, prefer it to be machine wound.
Load the bobbin with elastic thread and the top thread with regular coordinating thread. Elastic thread is commonly found in white or black. Don't worry about the color since it will not show. My machine also likes a longer stitch length for shirring. If you have not shirred before, always test this process using scrap fabric.
To shirr, load your fabric RIGHT side up in your machine. Beginning 1/2" below the front neckline, sew a line from armscye to armscye. No need to "lock your stitch" at the beginning and end. Sew another line 1/4" from the first line. I sewed 6 lines total. Do this for both the front and the back pieces of the dress. On the back, I started 1/4" from the top (instead of 1/2").
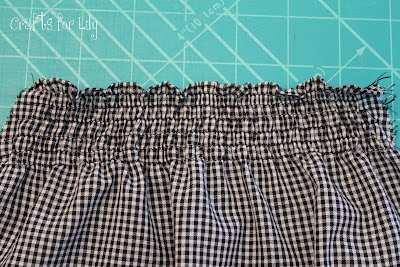
Now for the fun part, take your pieces over to your iron. Hold your iron a couple of inches above the shirred lines and hit is with a blast of seam. Your lines will shrink right up! We are done shirring, so take out the elastic thread and replace it with your regular thread--don't forget to reset your stitch length while you are at it!
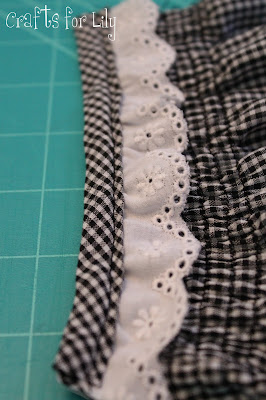
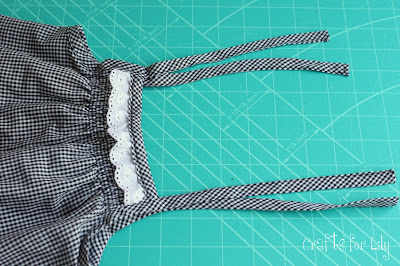
Next, measure your the width of your child's chest to determine how long cut the bias tape and the eyelet that will be sewn along the top edge of the dress. For an 18 month size, I am cutting each piece 6" long.
Tip: If your bodice did not shrink up enough with the shirring to accommodate the width of your child's chest, go blast it with some more steam or add another row or two of shirring.
Baste the eyelet in place.
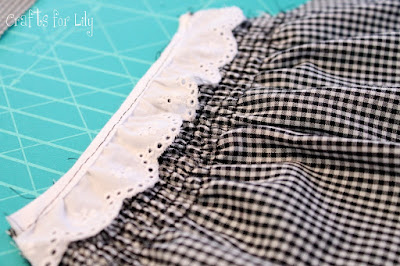
Place the bias along the edge and sew in place (I'll fully admit that I do it the "lazy way" and sandwich my fabric in the tape and carefully sew it making sure that the needle pierces both the front and back of the bias tape.)
Line up the armscyes on the front and back of the dress. You will notice that the back neckline of the dress is slightly lower than the front...that's what we want!
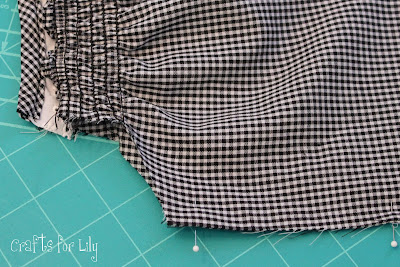
Sew the two dress pieces from the armscye down. Finish your seams with your prefered method and press to the back of the dress. I know, I know...some of you don't like pressing. Trust me, it is one of those steps that really makes a difference.
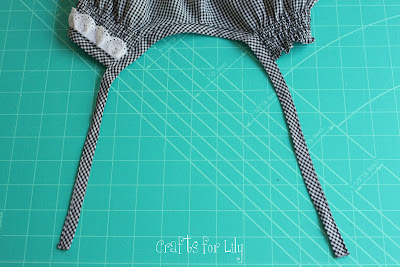
For the straps, measure your armscye from front to back and add an additional 14 inches to that measurement. For my 18 month dress, my armscye measures 11" + 14" for a total of 25". Cut two lengths of bias tape using this measurement.
Check out Craftiness is Not Optional for an easy way to finish the ends of your bias tape.
Begin pinning the bias to the dress at the side seam of each armscye. Again, I just sandwich it together (sewing enthusiasts cringe every time I say that!). Topstitch along the edge from one end of the bias tape to the other.
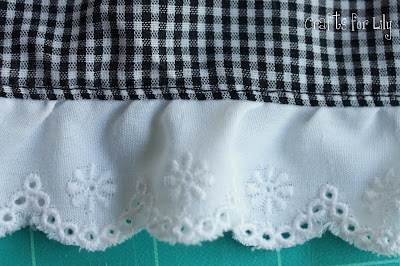
Two more steps and the dress is done! Line up the eyelet lace to the raw edge of the bottom hem (right sides together). Sew in place (I use a serger, but you can do it with a regular machine).
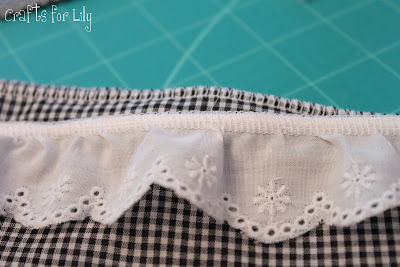
Turn under, PRESS and topstich to secure.
Give the dress one final press and you are done!
I hope your little one enjoys her new dress!
No comments:
Post a Comment